BloXYZ build blog
ANew NC Router
build blog
Software
NC Advice
Other projects
Links
| Bloxyz NC Router Build Blog |
|
BloXYZ build blog ANew NC Router Software NC Advice Other projects Links |
|
03/25/2005
Although it was more then six months ago that I finished the machine and
made my first cuts I only now consider the machine fully operational. The
moisture of san diego has left a beautiful coat of rust on the frame but the
rails are safely preserved in machine oil.

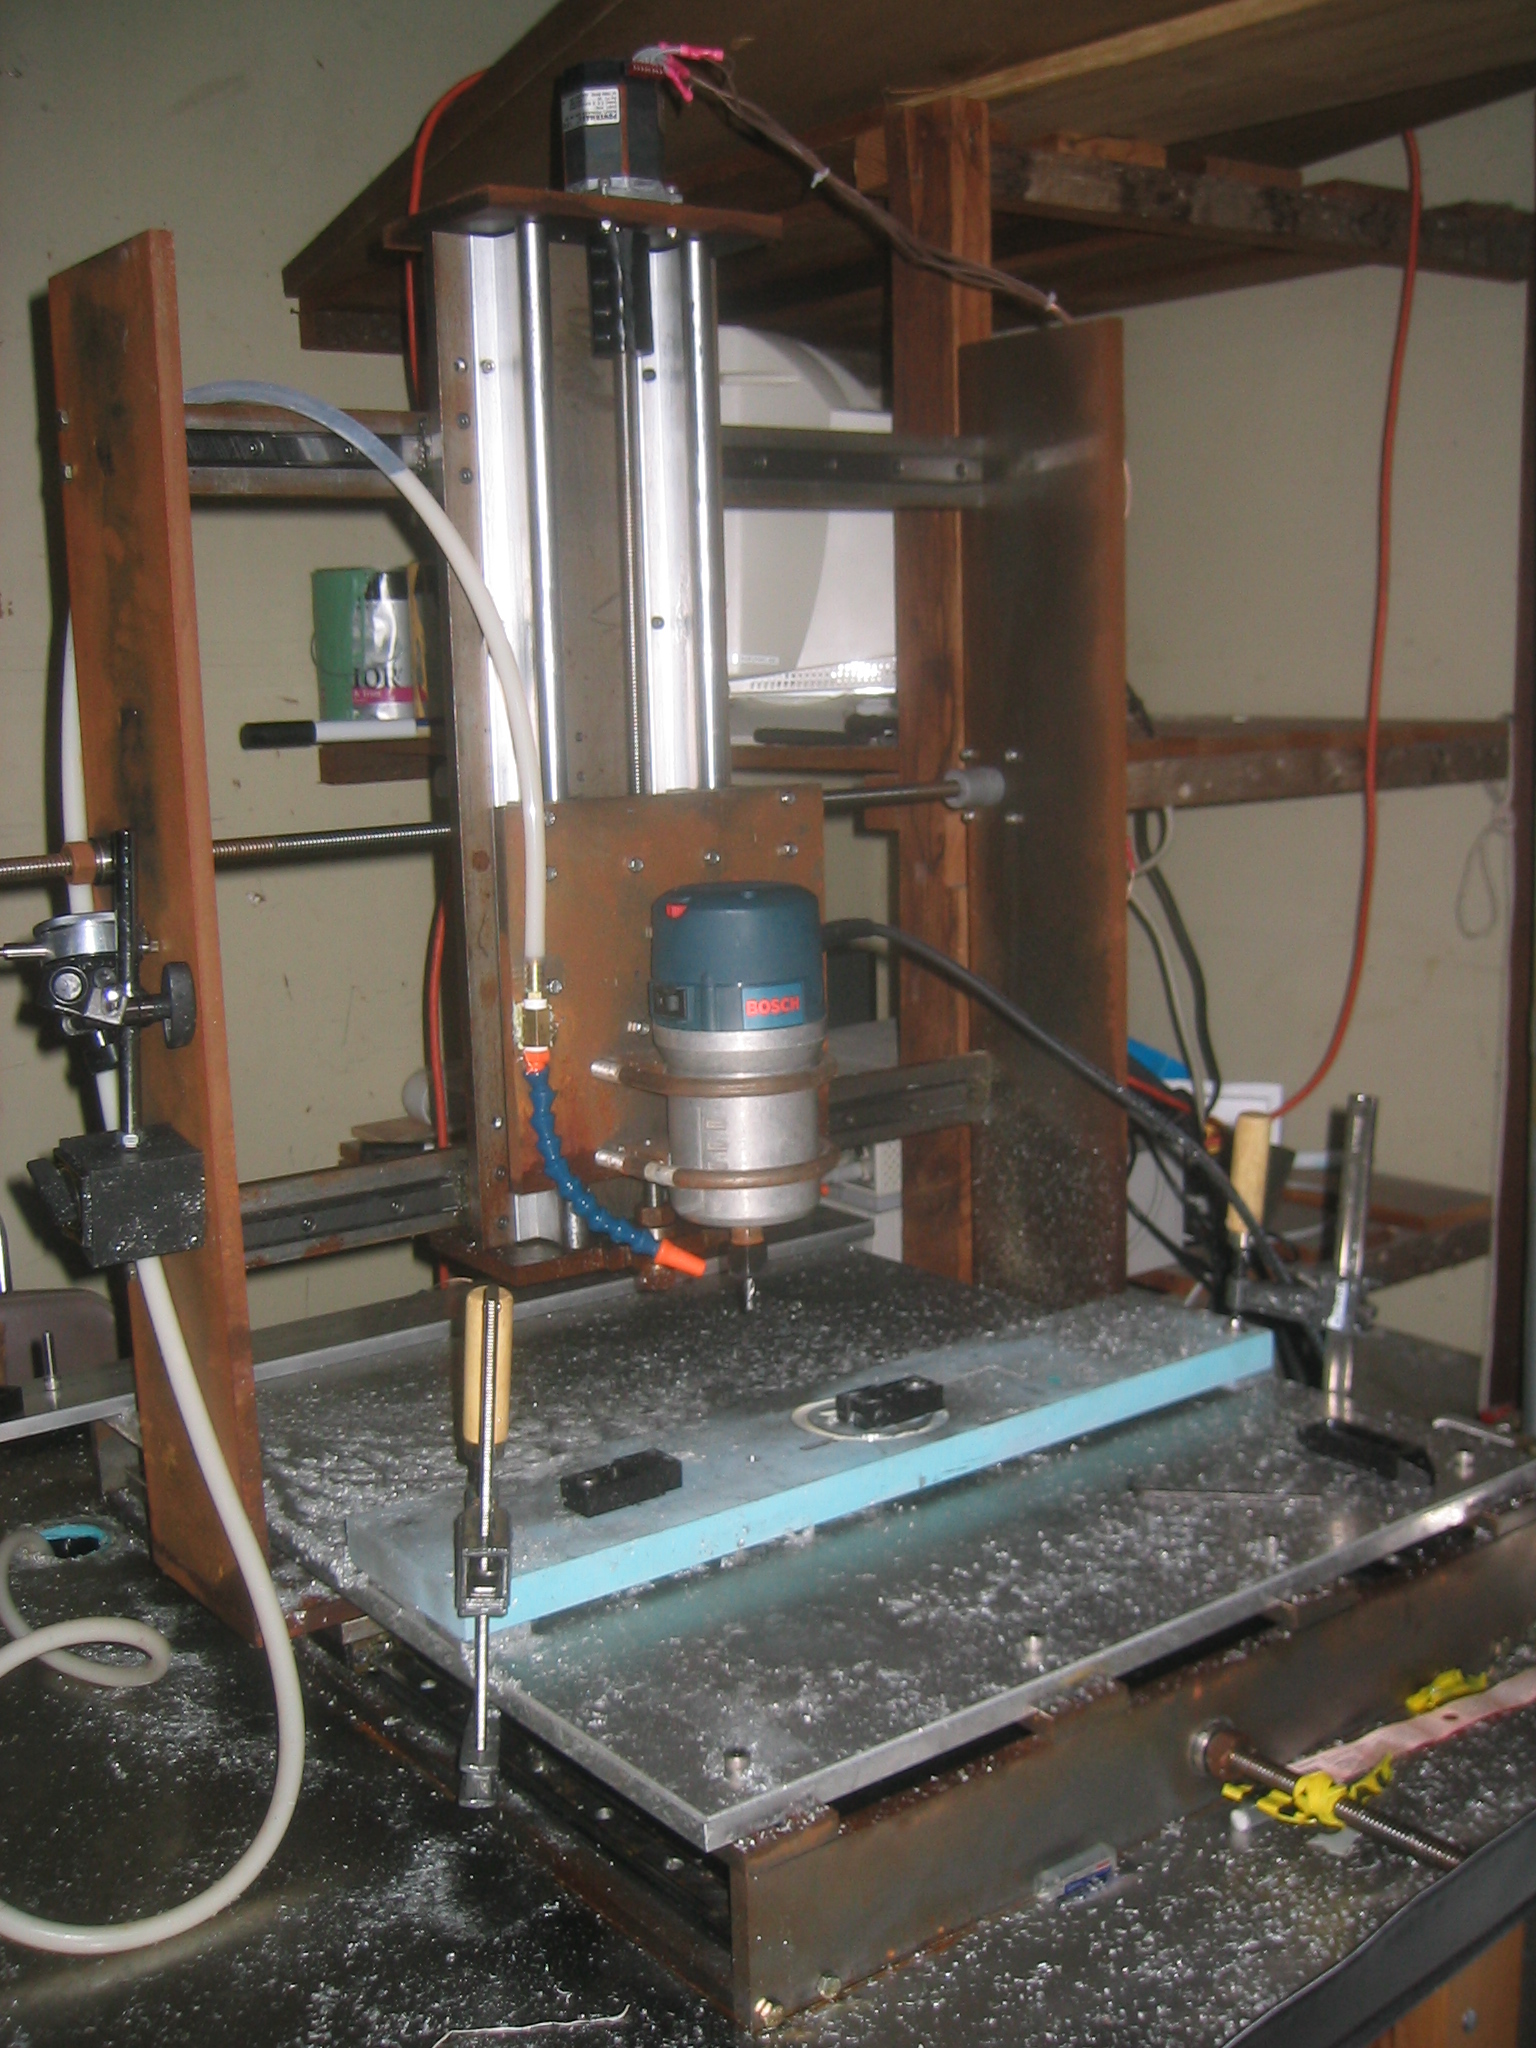
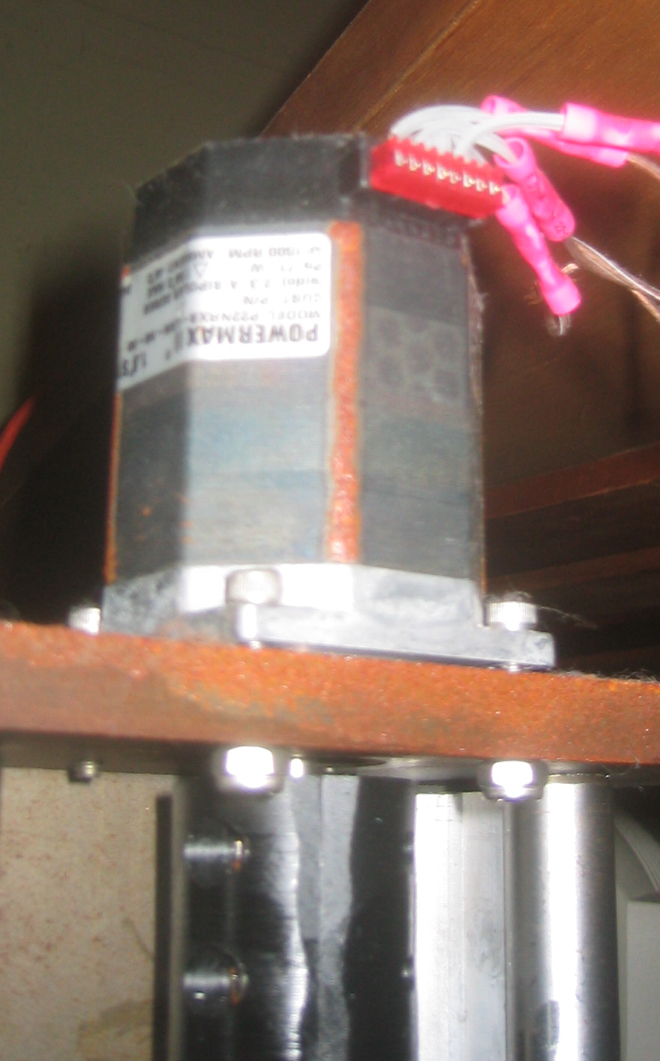
The motors have received an upgrade and the
home made delrin couplings have been replaced with some very nice helical
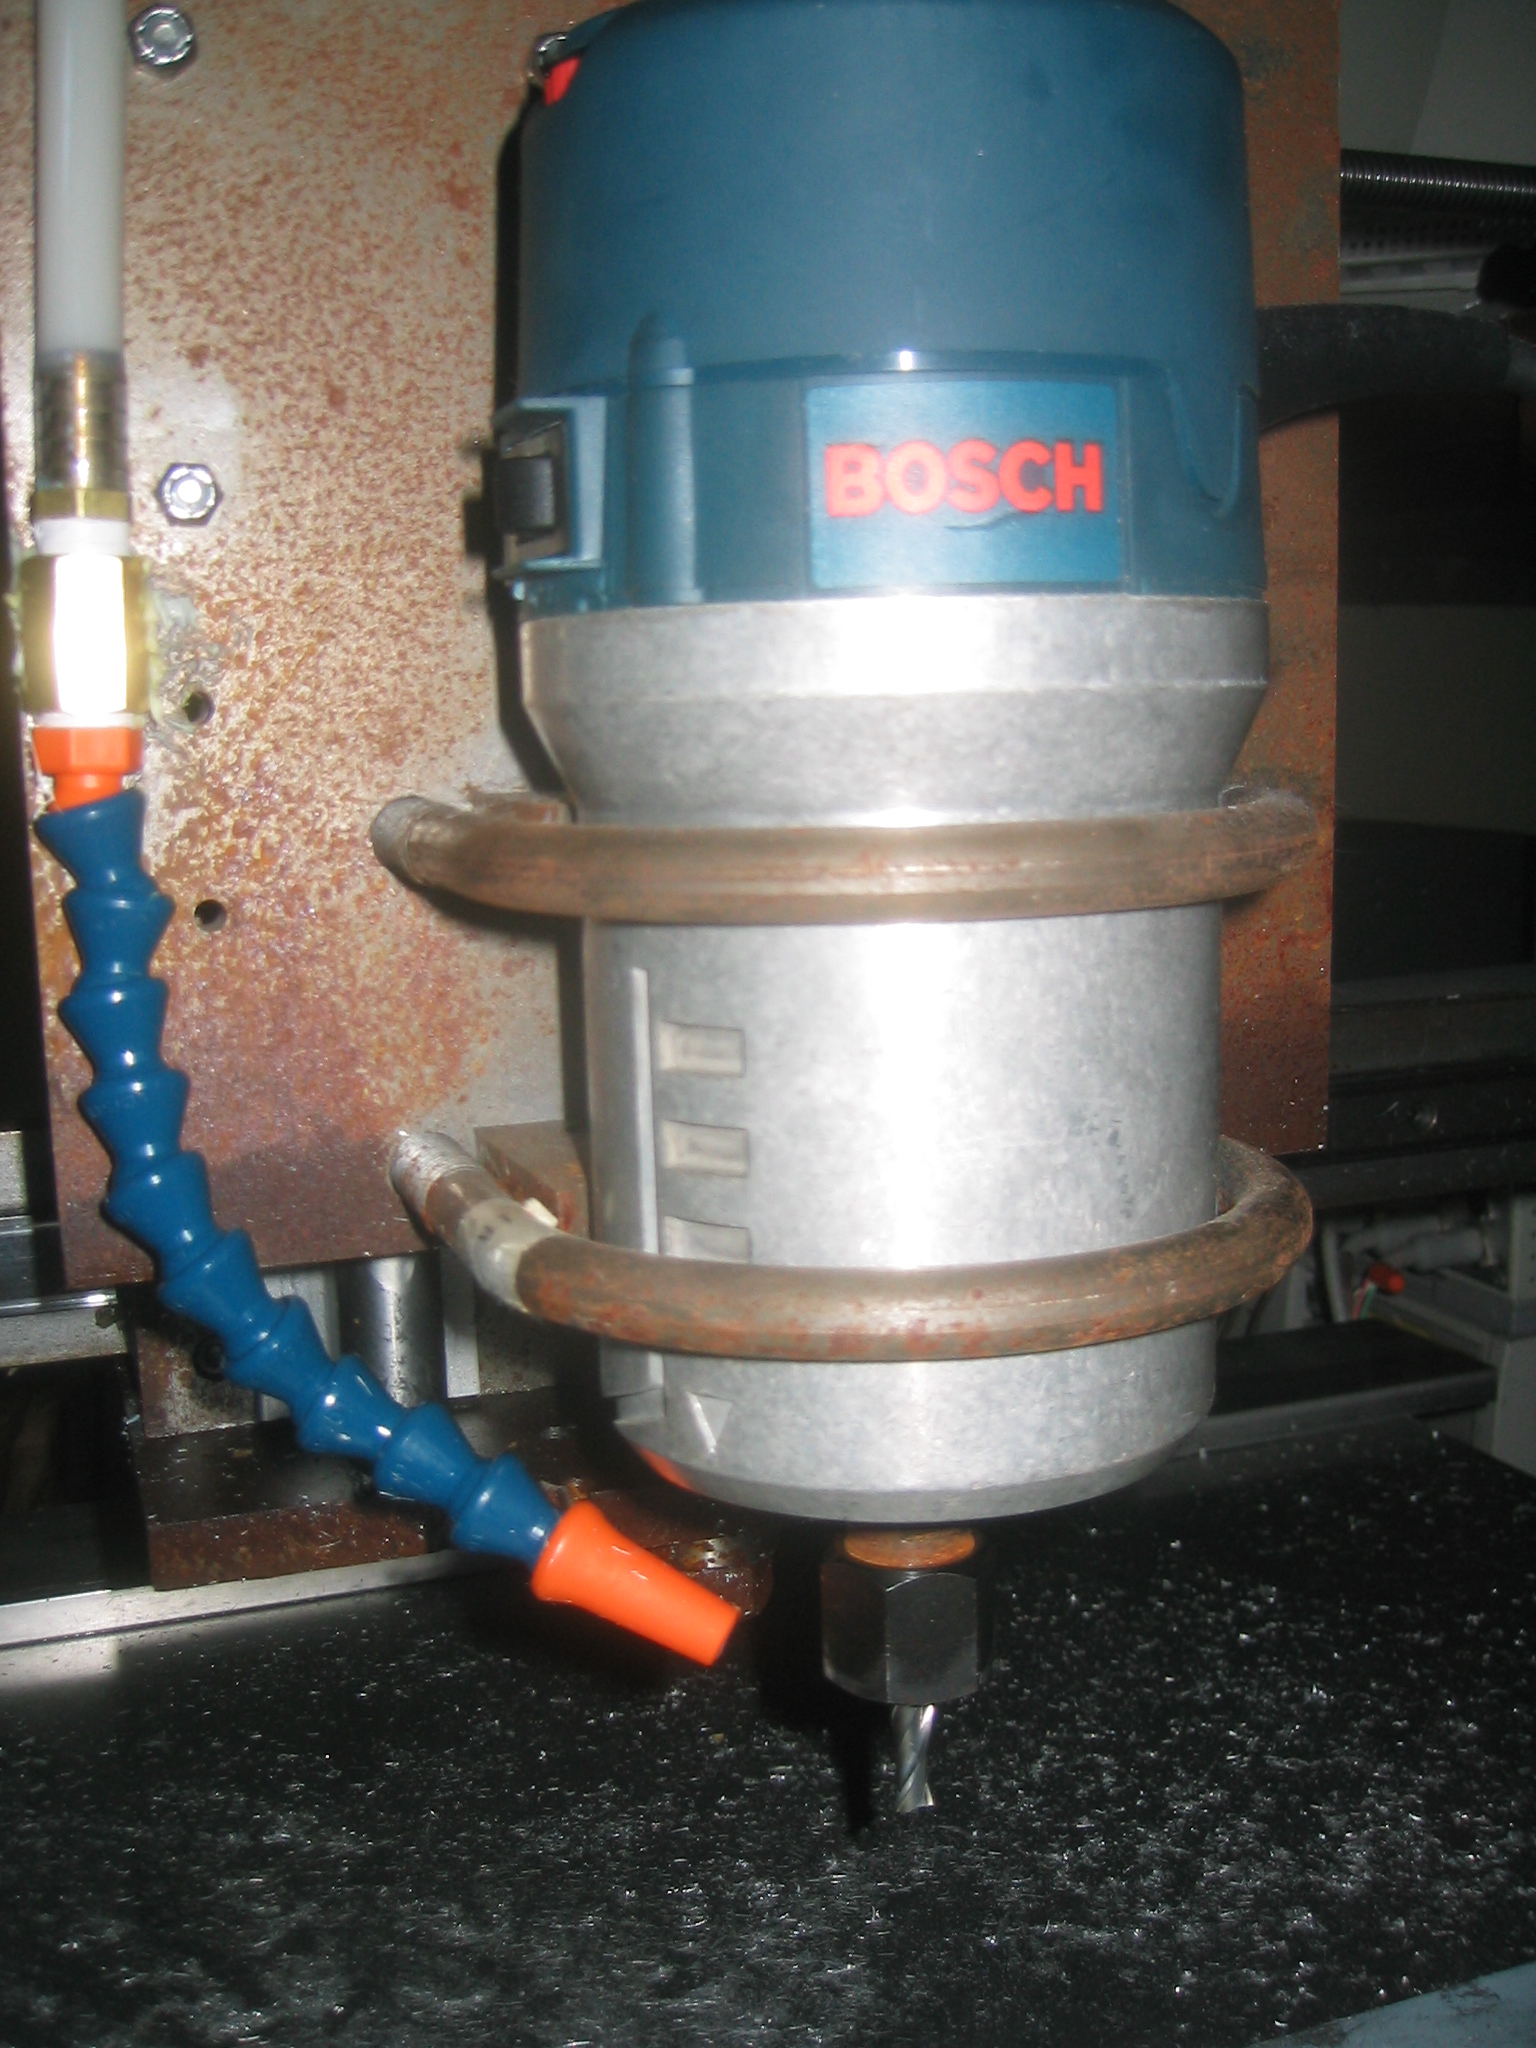
couplings. I have installed a liquid chip removal and cooling system. The
chip removal system also does a good job of keeping aluminum shavings from
flying all over the place.

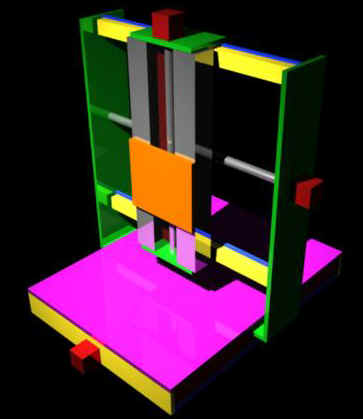
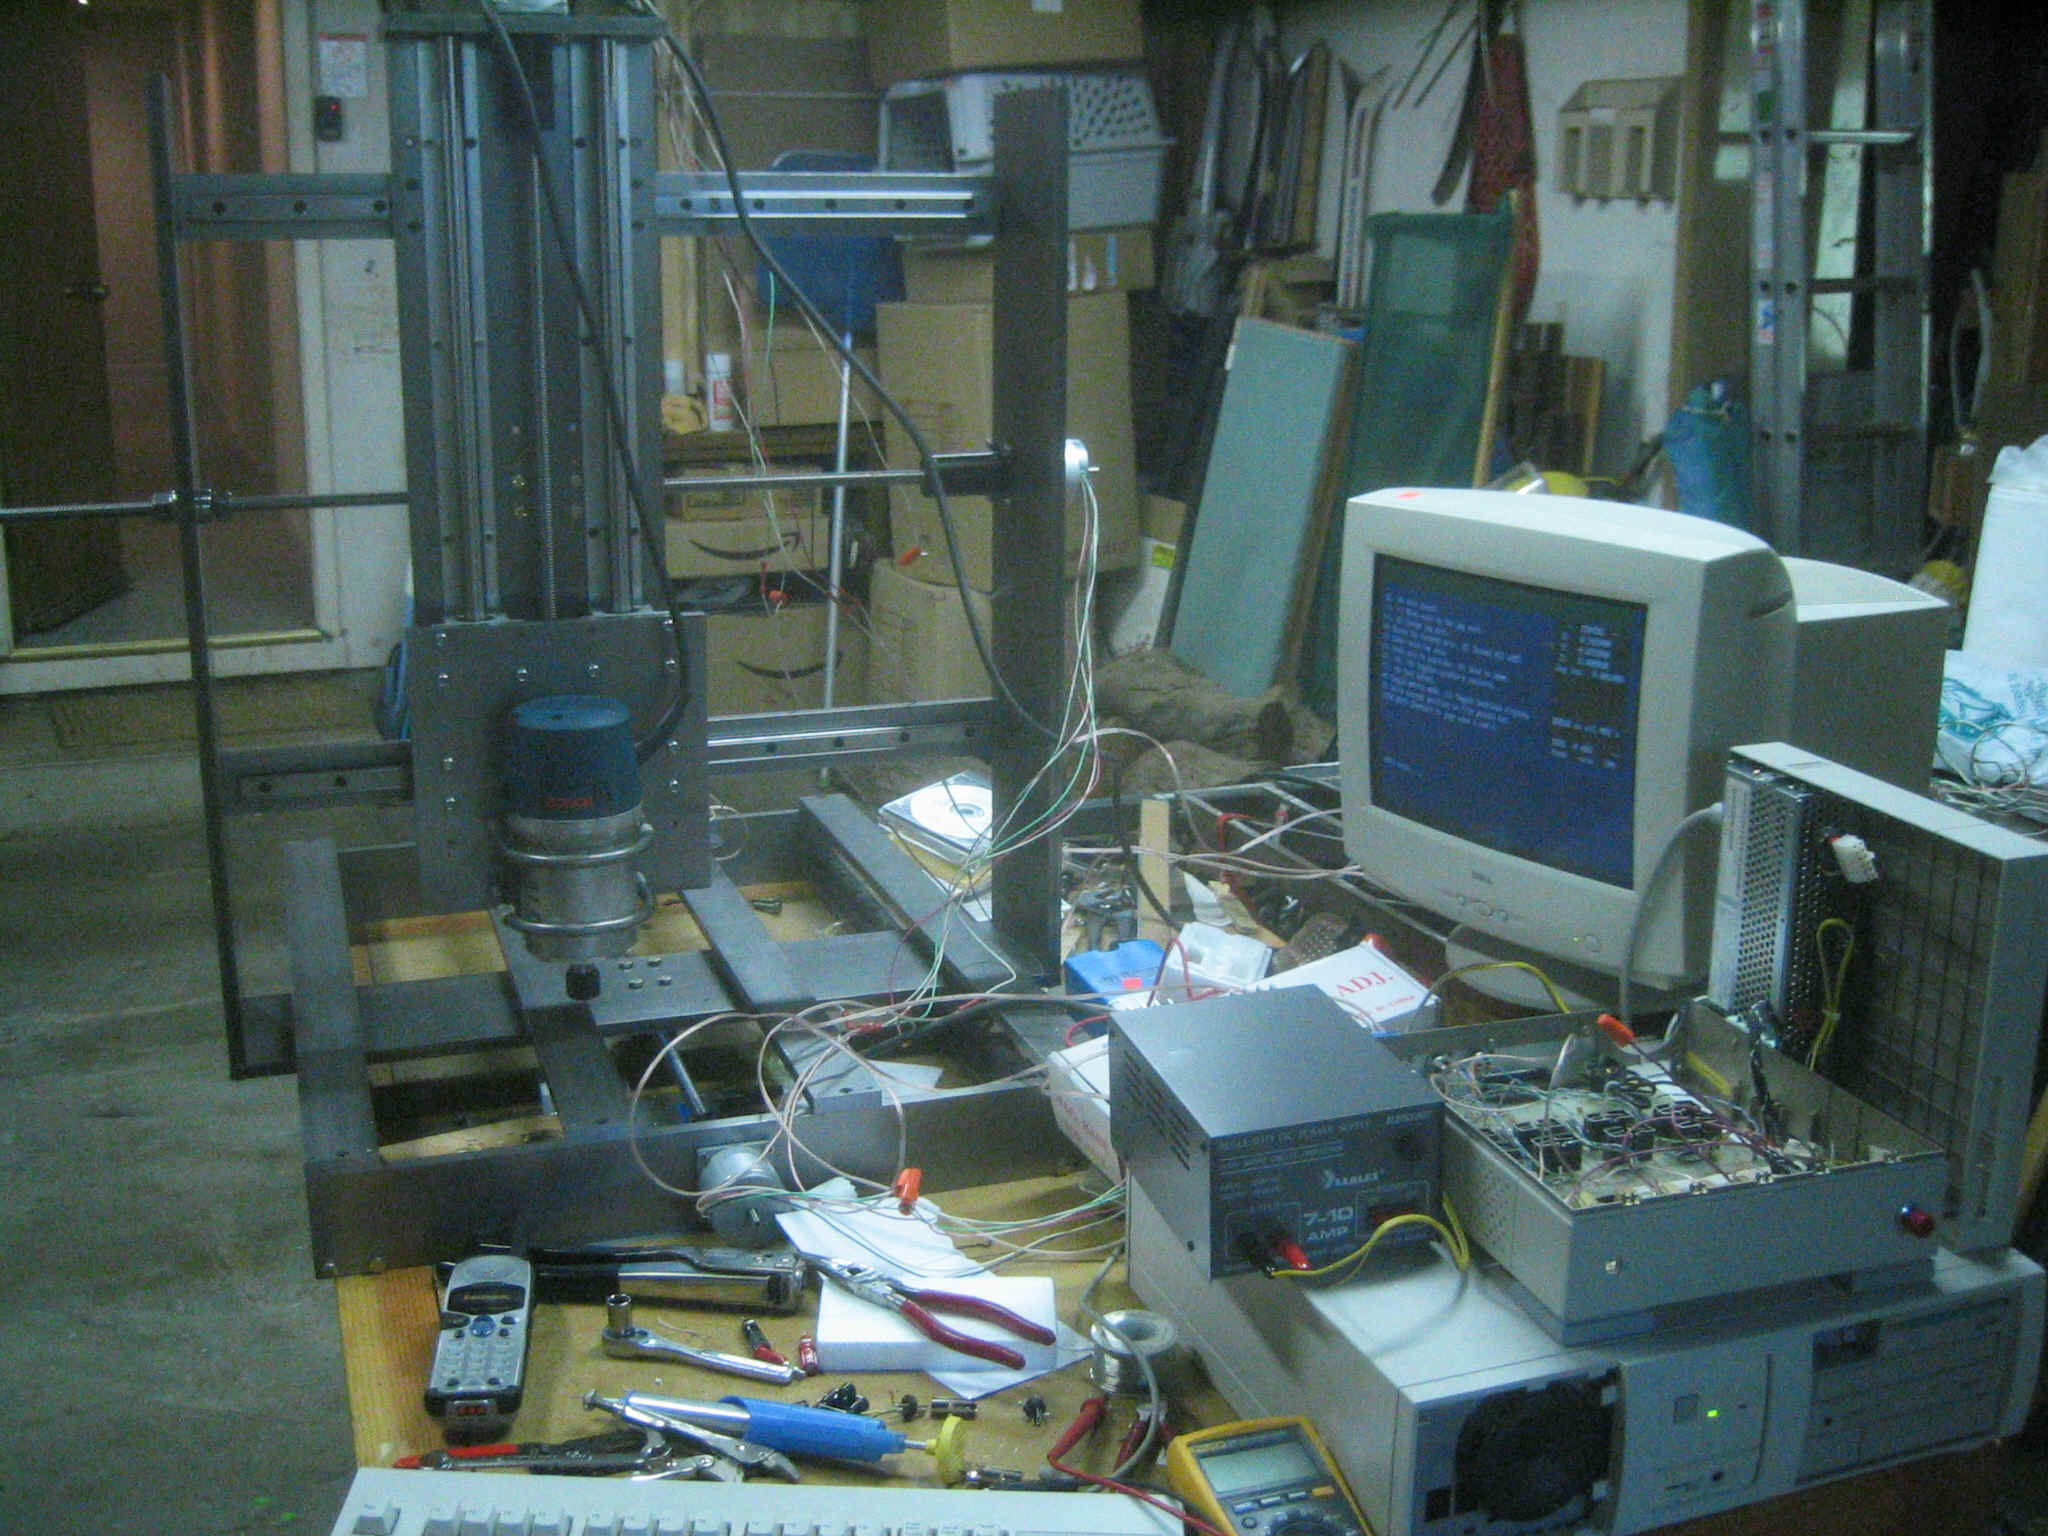
. So here we have it. On the right we have the "finished" machine and on the left we have the design a dreamed up a couple months before. The z tower is so tall to make it good for doing some foam cutting; I got the idea from buildyouridea.com though his is executed a little differently then I plan to make mine. Actually I got allot of the machine's overall design from looking at pictures on builyouridea though I like to think that my design has some of my own touches to it that make it different.
06/29/2004
Well I have been kind of slow in posting but that is just because I have been spending allot of time fine tuning my machine. Right now I have it up and running but the motors I am using are just a little bit under powered so I can't wait until the big guns arrive tomorrow though I might have to wait tell I move down to San Diego before I can install them.
So here is what I and maybe a couple of other people have been waiting to see.
I hope to get a hold of a video camera at some point such that I can get some actual moving pictures on the site but until then this still shot will have to do. If the control box looks familiar to any of you it is because I got it from Dave Kush the man behind buildyouridea.com. He lives in my area so I took the opportunity to visit his shop and pick up his old Unipolar controller.
06/21/2004
I can't get any good pictures yet cause my project space looks like it was hit by a nuclear warhead but despite that I made allot of progress today including getting the motor mounts cut for my router which I had to get done at my fathers work due to a lack of equipment at my place and fixing several errors that I had initially made due to neglecting certain design features. Those features would primarily be then nut and bearing protruding from the bottom of my z-axis thereby cutting my clearance by over an inch.
Besides that the project is coming along great and should be finished by tomorrow. Due to a lack of a controller I will not be able to test the machine until this weekend.
06/18/2004
Woohoo!! today was the first day I was able to find my page in a search engine. Specifically http://www.dogpile.com/info.dogpl/search/web/bloxyz. So at any rate this leaves me pretty psyched.
Last night I was out pretty late and I also spent most of yesterday trying to incorporate I structural design feature that simply won't physically fit the way I was trying to do it. but I did make plenty of progress the day before that so I am feeling ok though this part of the building process is taking longer then I would like.
Wednesday I finished both the X and Y axis so the only thing left to do is finish the z-axis. I did find dome errors tat I made during fabrication. Non of them turned out to be critical so I am going to go ahead and finish the machine before making corrections to any of the parts.
06/14/2004
Finishing the machine has been delayed by a the necessity of visiting San Diego to find a new place of residence to occupy while I attend UCSD. Today I got up late but I still managed to get some work done. I think tomorrow will be much more productive.
06/10/2004
I spent most of today fabricating the couplings to hold the acme to the motors. Waking up this morning I had originally thought they were going to made of steel but after having taken my morning shower I realized that I still had a fair bit of delrin left after making my AB nuts.
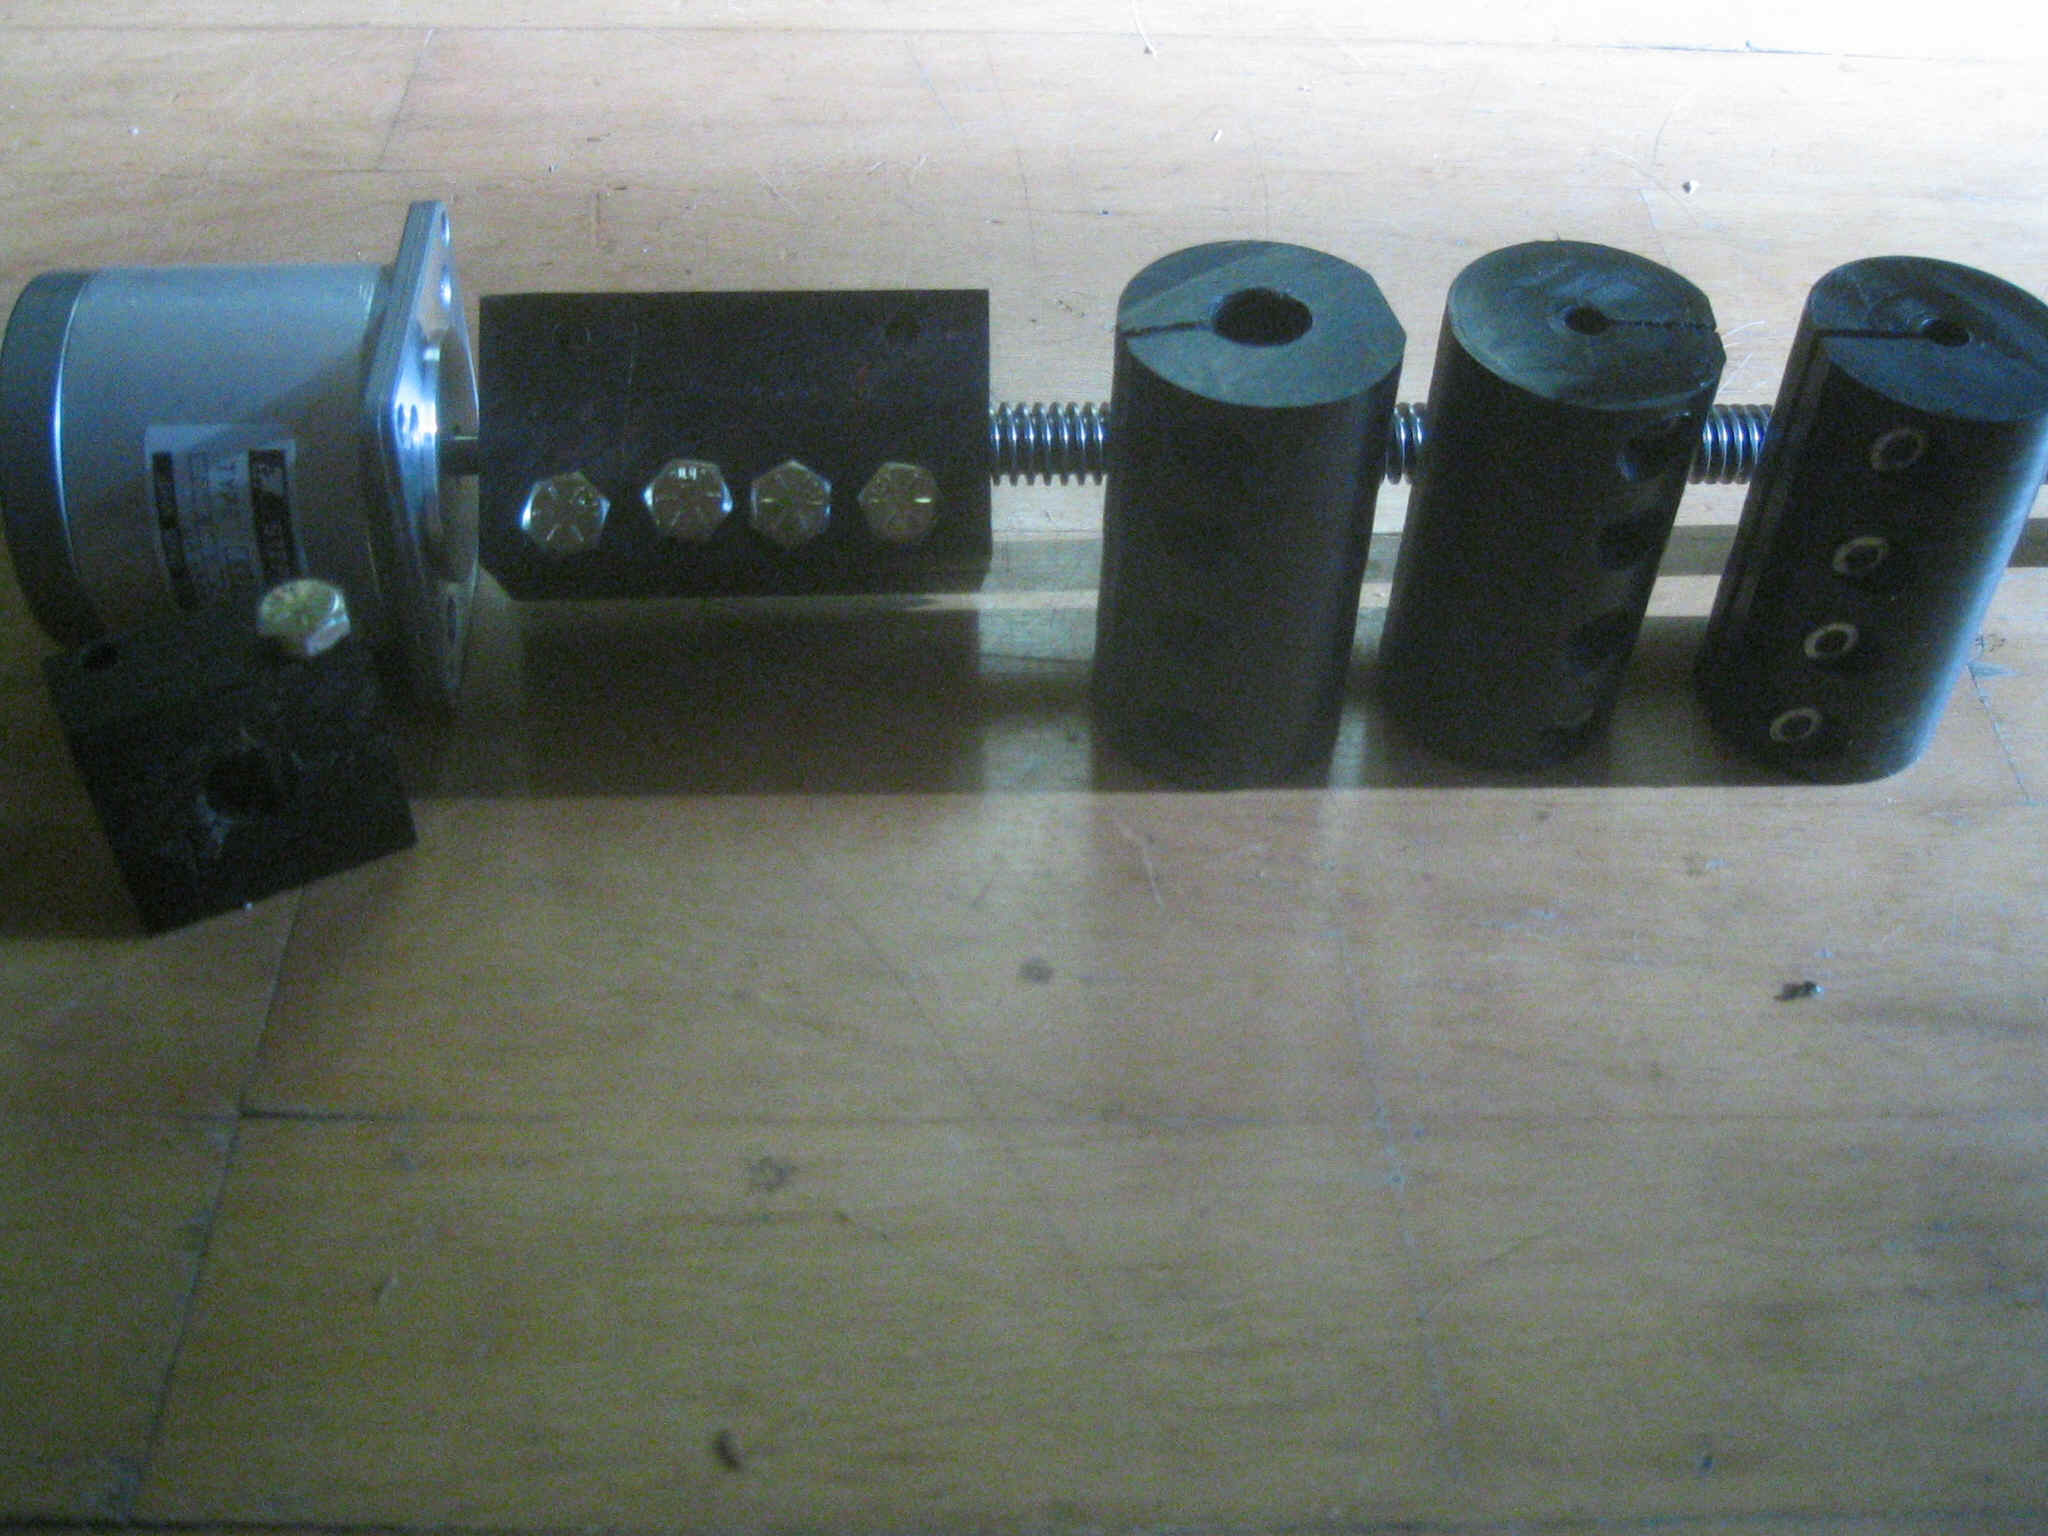
In the picture from left to right is my prototype coupling. I made it out of a piece of scrap to see if the delrin would have enough grip not to slip. Next is the first prototype connector made out of a failed AB nut. This one worked but was to big and would have gotten in the way. The last three are my final products. I think in the future I could have made them allot faster but I did not get the order of operations optimized until I had already finished the last one. I think these might even be better then steel but I won't know until the machine is done. I also think that I am going to need a more powerful stepper motor but I will give these ones a shot before I give in and fork out the big doh for the big steppers.
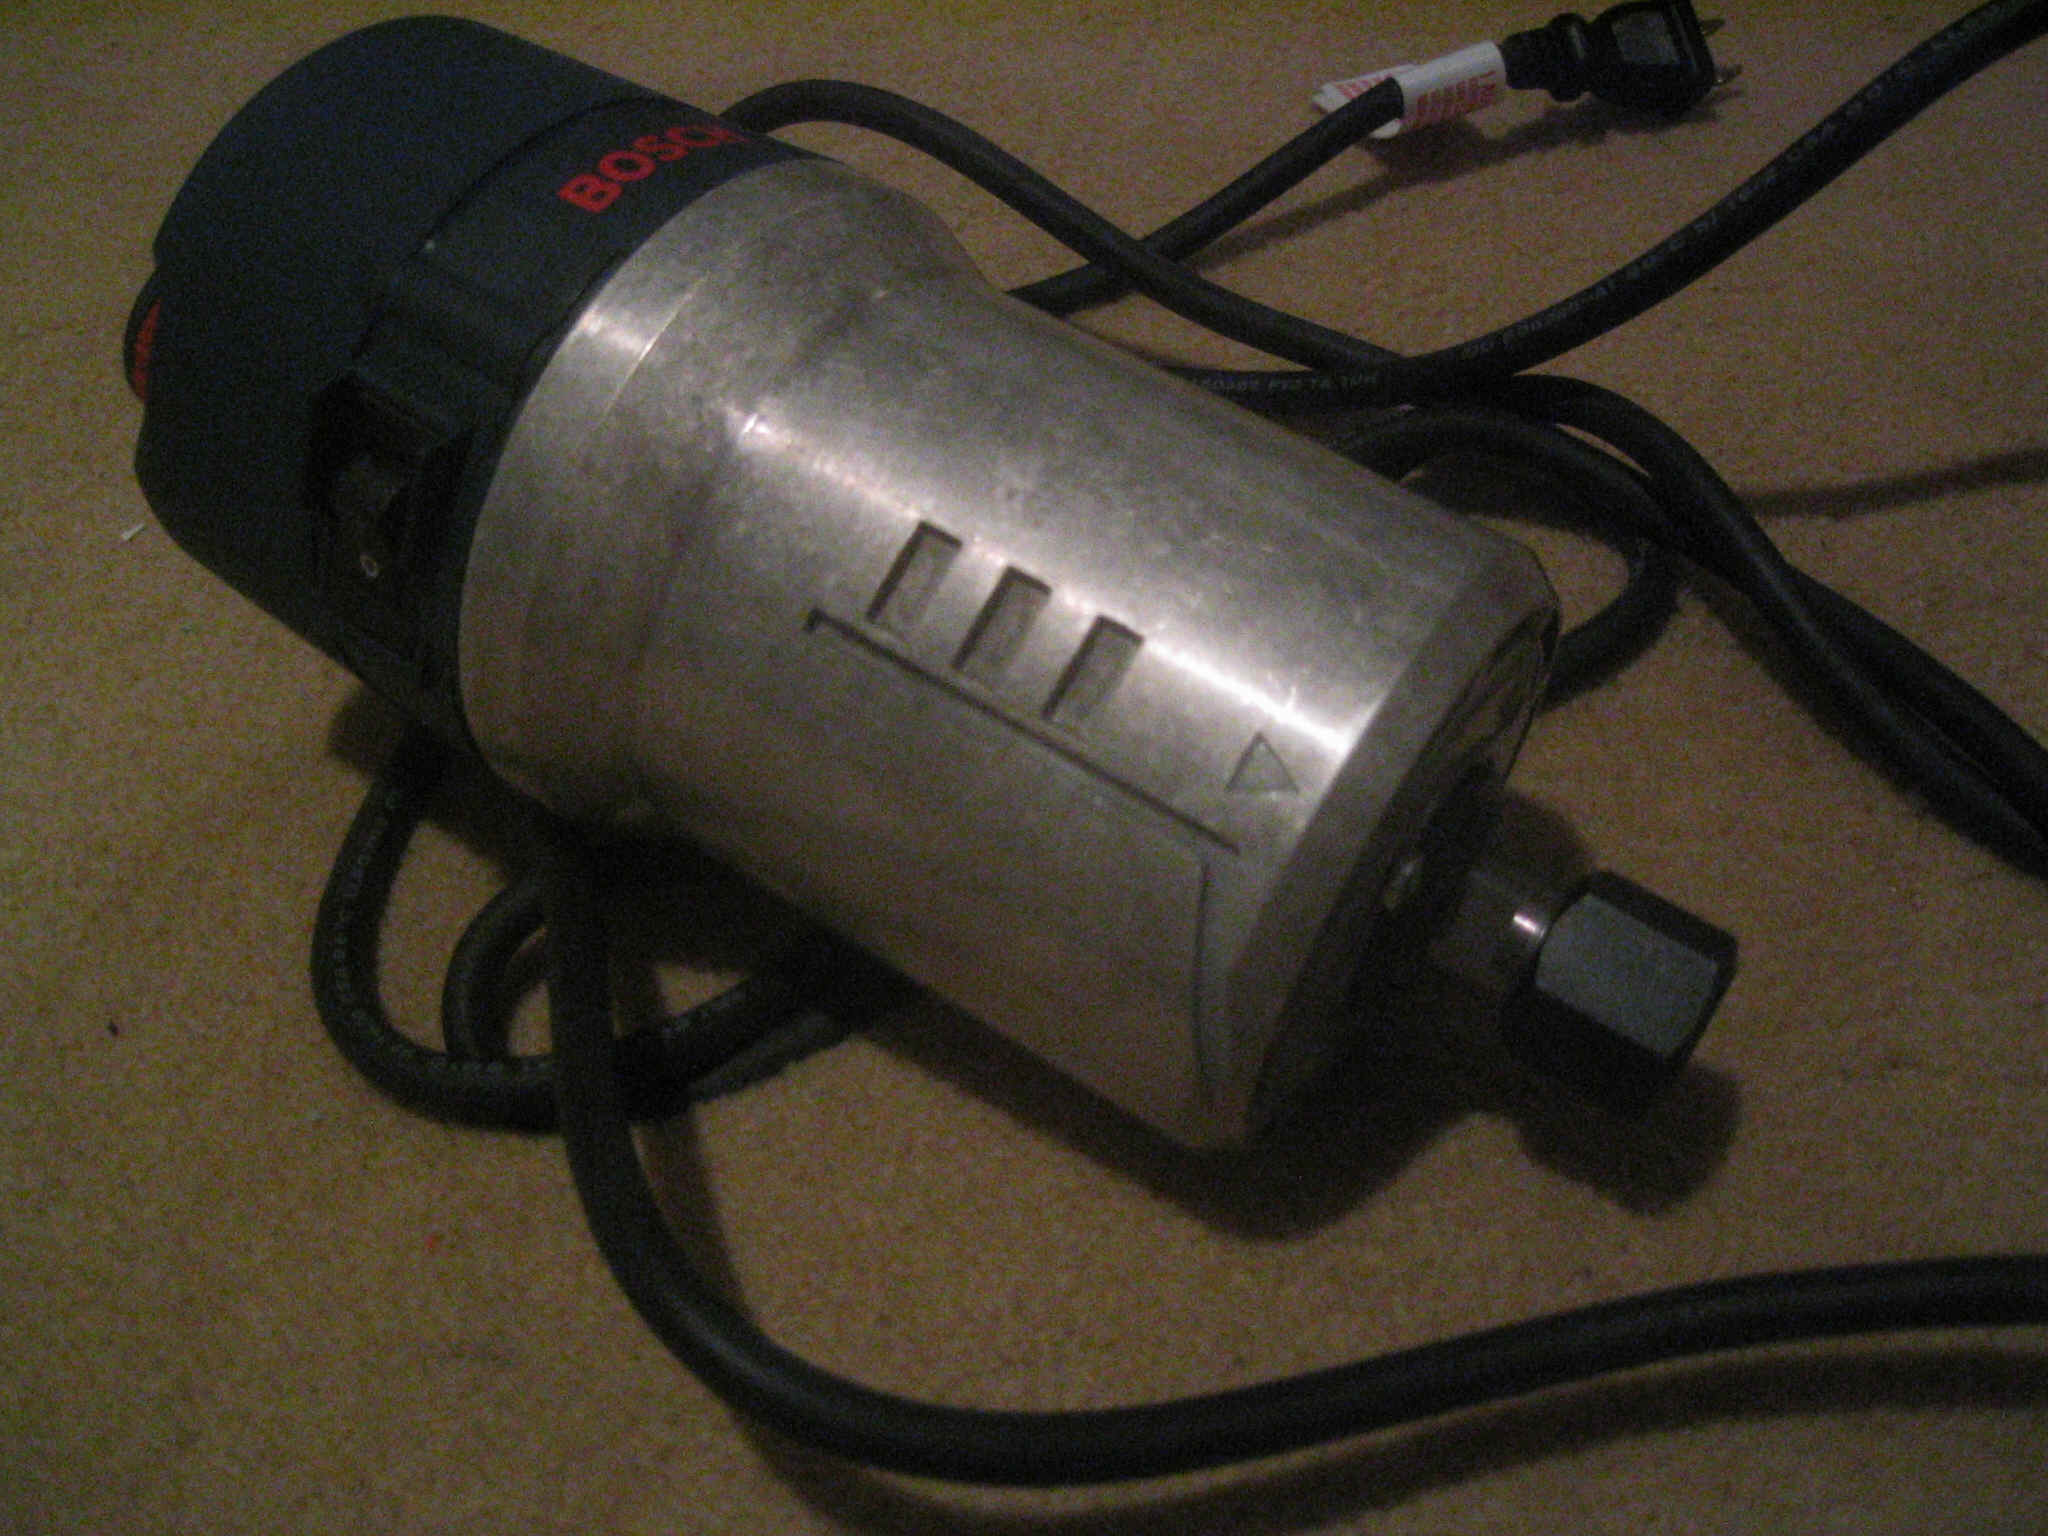
I also got my router in today. It is a Bosh 1617evs. I think it should be more then powerful enough with 2 1/4 horses inside and the round body should make it a joy to mount. It also sports an integrated speed control that is designed to keep rpms constant, even under load. It also was only moderately expensive at $160. I can't wait to get this thing running.
06/09/2004
Sense my last post I made knew spacers for the x axis, found a really good deal on 1/2" acme threaded rod, and finished my AB nuts a got 3 3ft lengths for just $3.50 a piece from Enco and they got to me the next day even with the cheapest shipping (Boy I love being close to my supplier). I also ordered my router motor which should be arriving tomorrow.
The original spacers I made caused the bearings to bind a bit so sense I had to order more material anyway I ordered enough to make a replacement for the first one.. The new ones work great and slide as smooth as ice. I also found some time to get the tower base mounted on the x axis.
It took several phone calls but I found some delrin plastic to make my A/B nuts with. The stuff seams to be pretty tough and I think they will do a good job. It took my the better part of today making a tap for them out of some spare acme threaded rod as is outline by Dave from buildyouridea.com here. Not having a mill I made mine by mounting about 8" of acme in my drill press and then taking a file to one end. After that all I had to do was grind the slots for the flutes with my angle grinder.
I did have to try more then once and about an hour to get a working tap and even then it was not very efficient and took me about an hour a piece to tap each of my approximately 3" long AB nuts. The finished product is great and fits the acme rod like a glove. I highly recommend this method though if you have a job you might want to put in the extra hours and by yourself a proper tap. You can get one from Enco for about $40 though cannot cut nearly as deep as my tap. I am not sure if it was really necessary for them to be 3" long but it does not seam to hurt none either.
06/05/2004
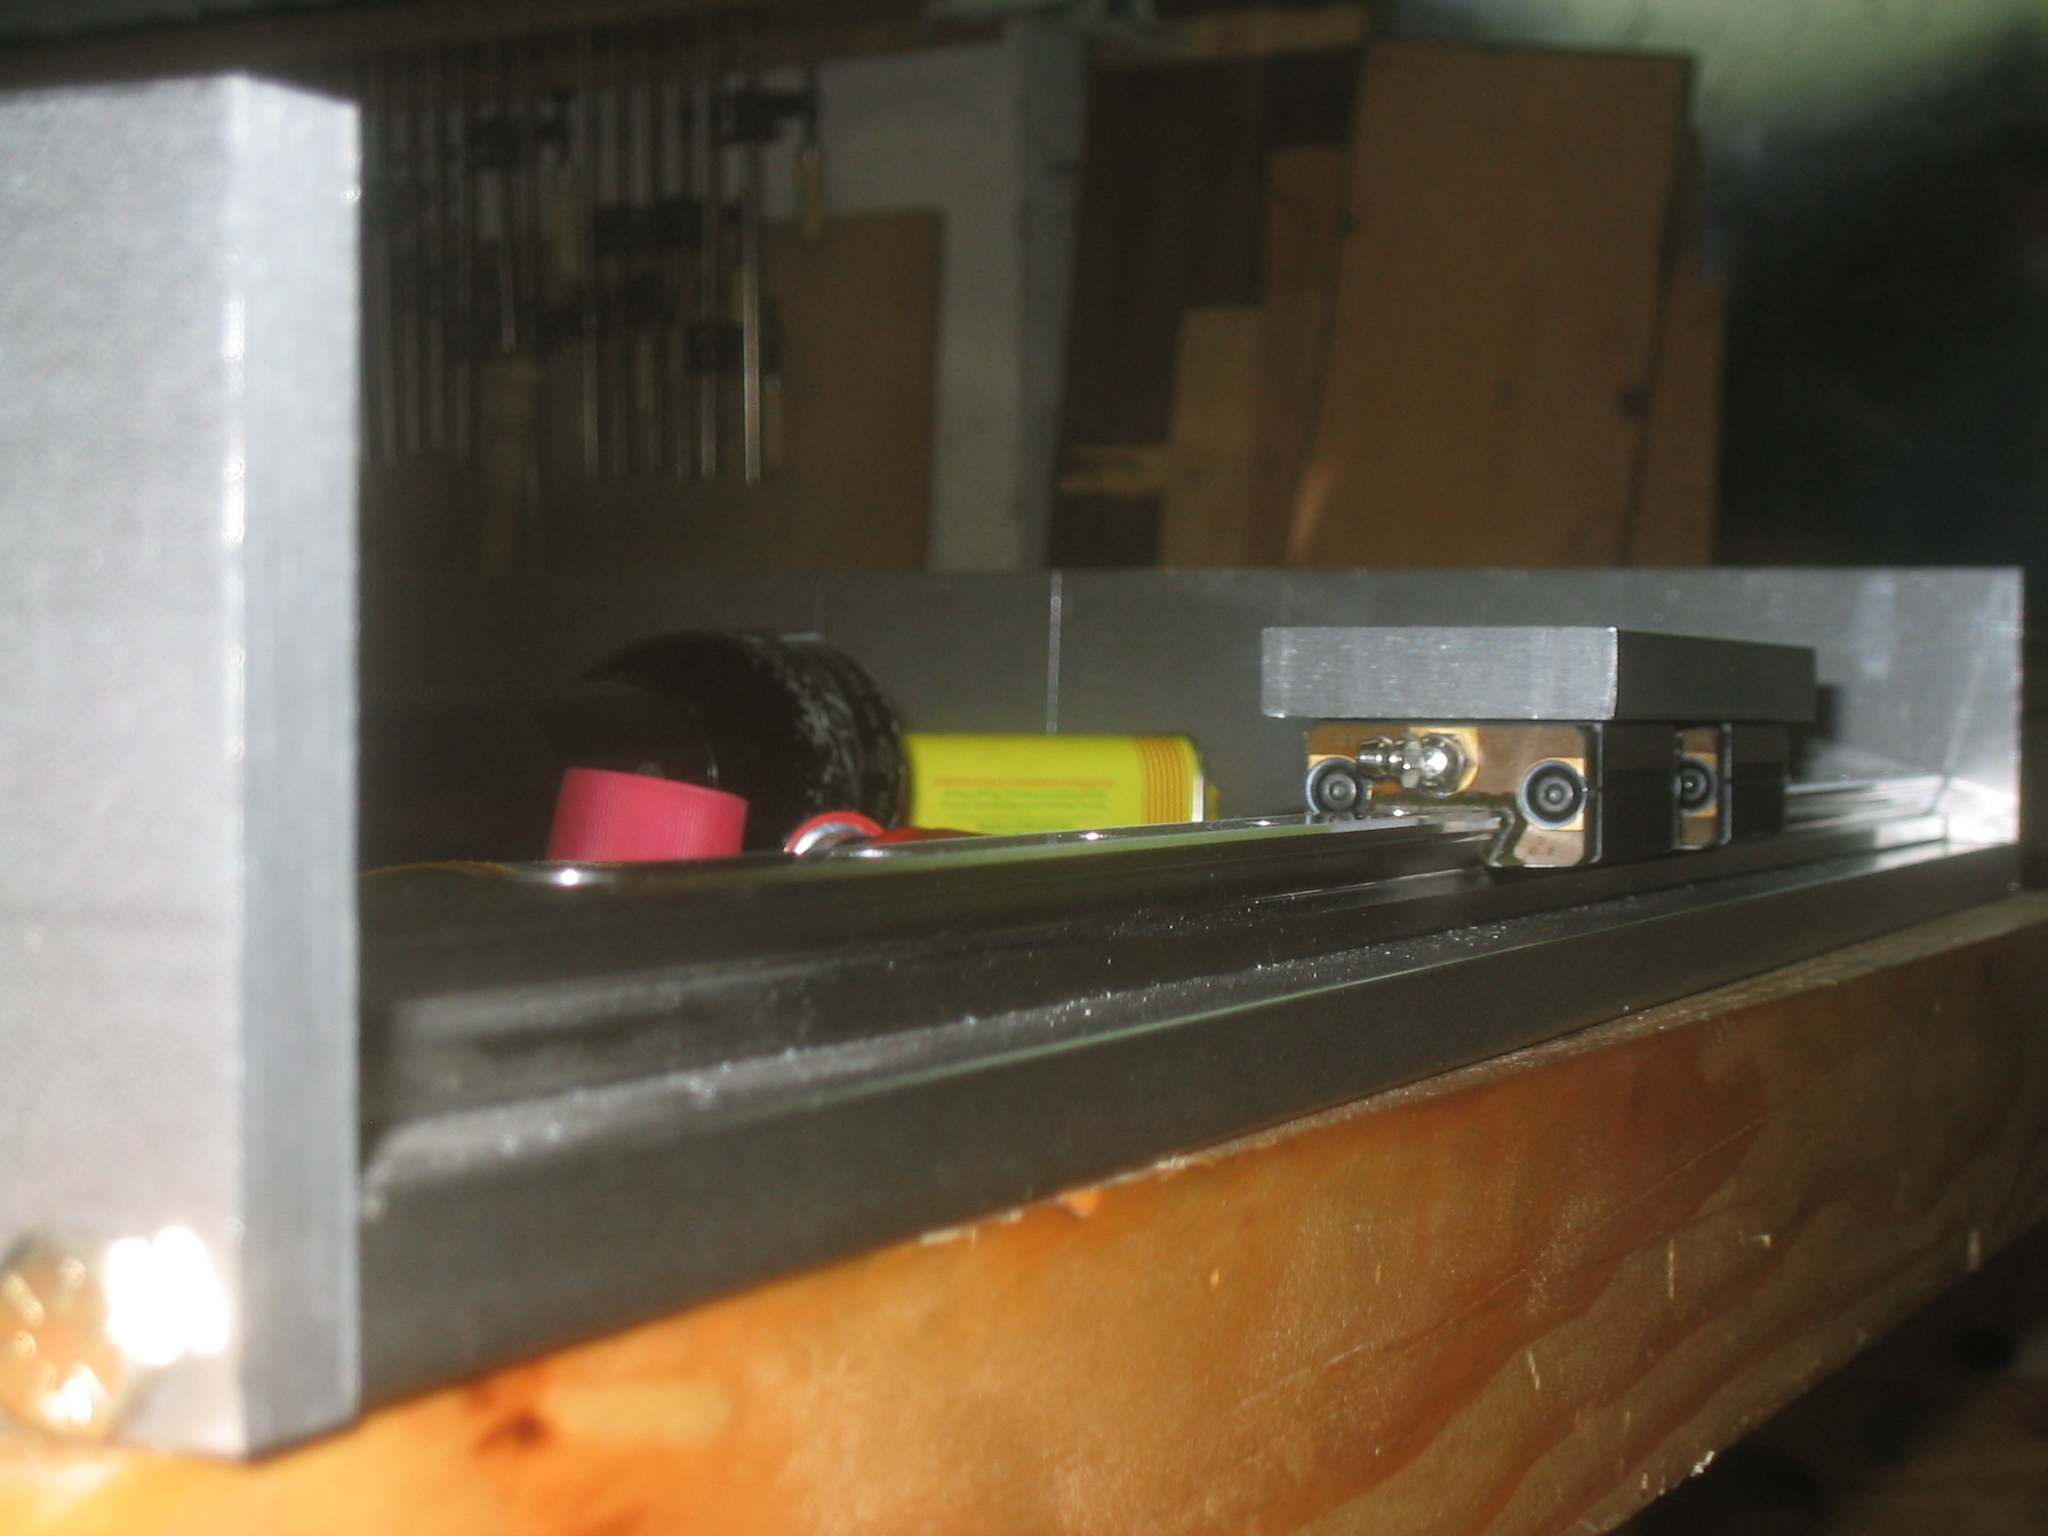
Yesterday I finished assembling the z-axis but I forgot to take pictures before I took it apart so I could make room to finish the second space on the x-axis. I have to tell you that the Thompson linear pillow block bearings are beautiful and slide much easier then the thk bearing which are very stiff in comparison.
The next time this thing is put back together should be when it is finished. Hopefully that happens sometime next week.
06/02/2004

click photo to see full sized picture.
I finished putting together the rails for the y axis yesterday and the tower seams to be pretty rigid now. I have been waiting tell I have everything together before I start mounting the screw drives and stepper motors so I can make some measurements first. I also am missing one of the spacers for the x axis so I have to wait for the replacement material to come before I can continue work on that.
The rails were mounted so far back so that when the z axis is mounted the spindle will mounted as close to the center of the tower as possible.
05/29/2004
And on the seventh day he rested and put up pictures. To anyone who has been keeping up on my project you might want to backtrack a little bit as I have posted the pictures with the days that they belong. To see larger copy of any of the photos just click em.
05/28/2004
I have been kind of tardy in posting updates on my progress this week
.
click photo for full sized picture.
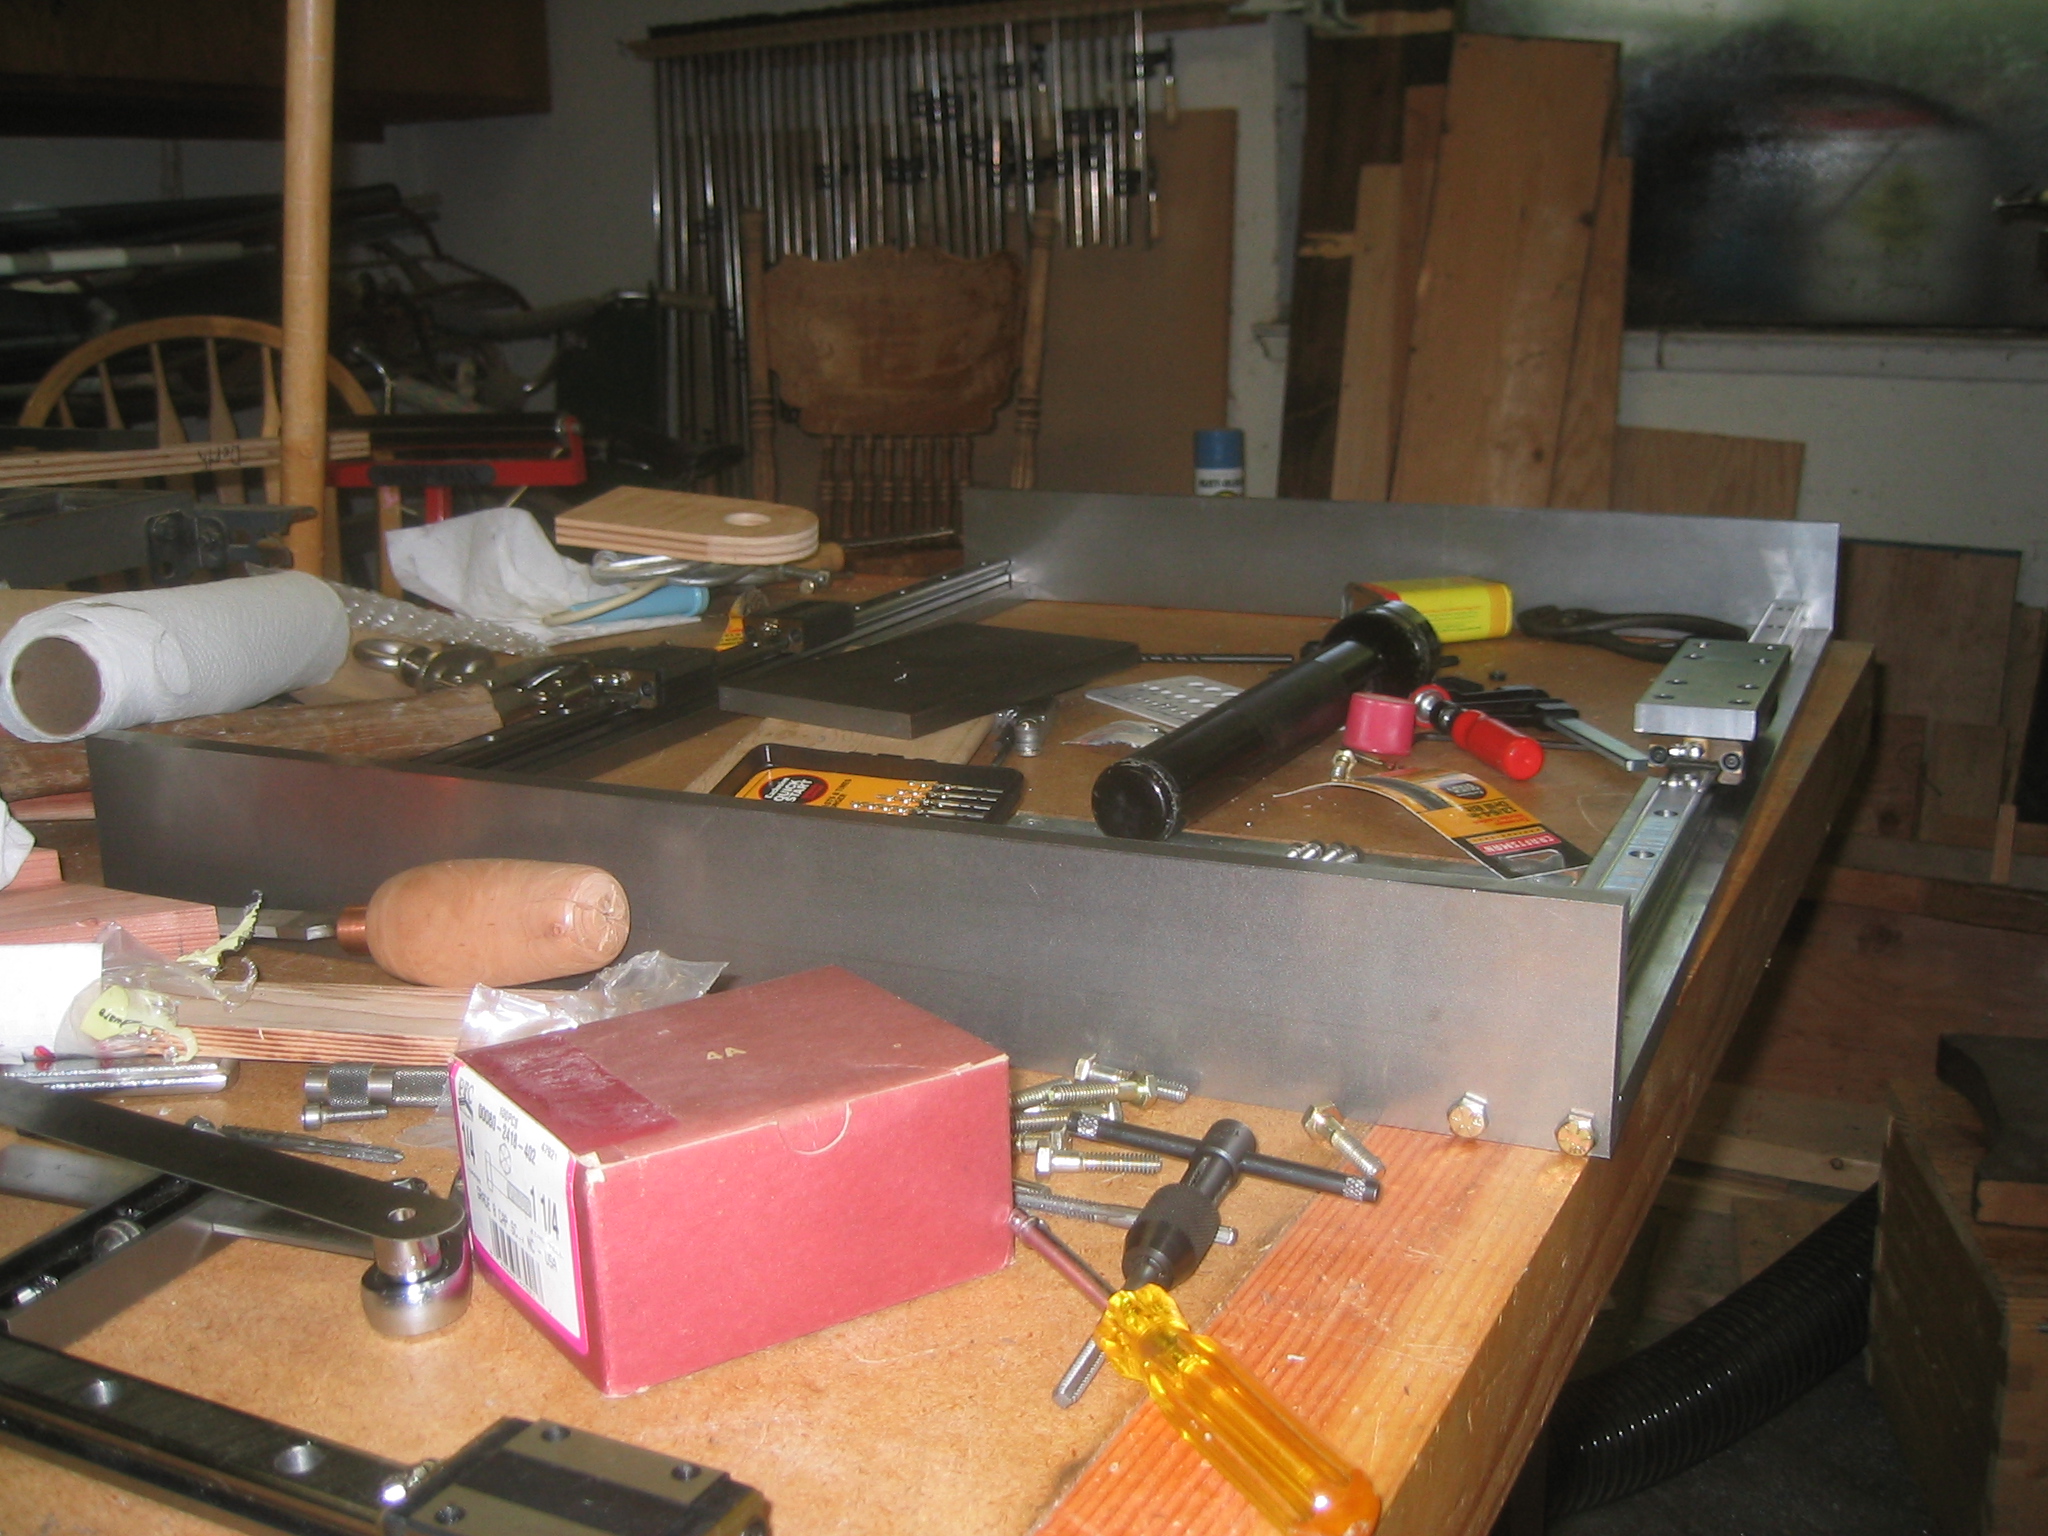
It is really starting to look like something now. So far I have drilled about 76 holes though 1/2" steel many of which were actually drilled through the ends of the beams and about 50 of them had to be tapped. I never thought that some clamps and a descent drill press would be capable of this kind of precision but I guess I was wrong. Each of the rails in the picture required 13 holes to be drilled and tapped in perfect alignment; I think I got it pretty good. The spacers on the bearings will allow enough room for the threaded rod and AB nut to be mounted later (only one is installed in the picture).
I would have to say my most valuable tool is this little six inch right angle that with some creative use at times has--- given me the capability to make the necessary measurements with the kind of accuracy I am looking for.
Tomorrow I expect to have pictures up of what I have done so far and a little bit about how I did it for any one who is interested
05/20/2004
School is finished so I have a whole lot of free time to work on my CNC machine. I started drilling and tapping today but had to stop after I broke my tap in my first whole. Tomorrow I am gonna need to go back to the hardware store and pick up another tap and a bigger bit for drilling the wholes.
I also need to improve on the system I use for holding the rectangular stock while drilling into the ends. Make shift is a nice word for the way I am doing it now and one of my wholes was way off but fortunately I have not drilled its mate yet so hopefully I can make some corrections and get back on track. I am considering breaking down and paying a machinist shop to drill the wholes for me but I have yet to give up and I would like to say that I built this myself after all "real men build from scratch", John C Kleinbauer www.crankorgan.com.
05/12/2004
In the beginning there was steel!
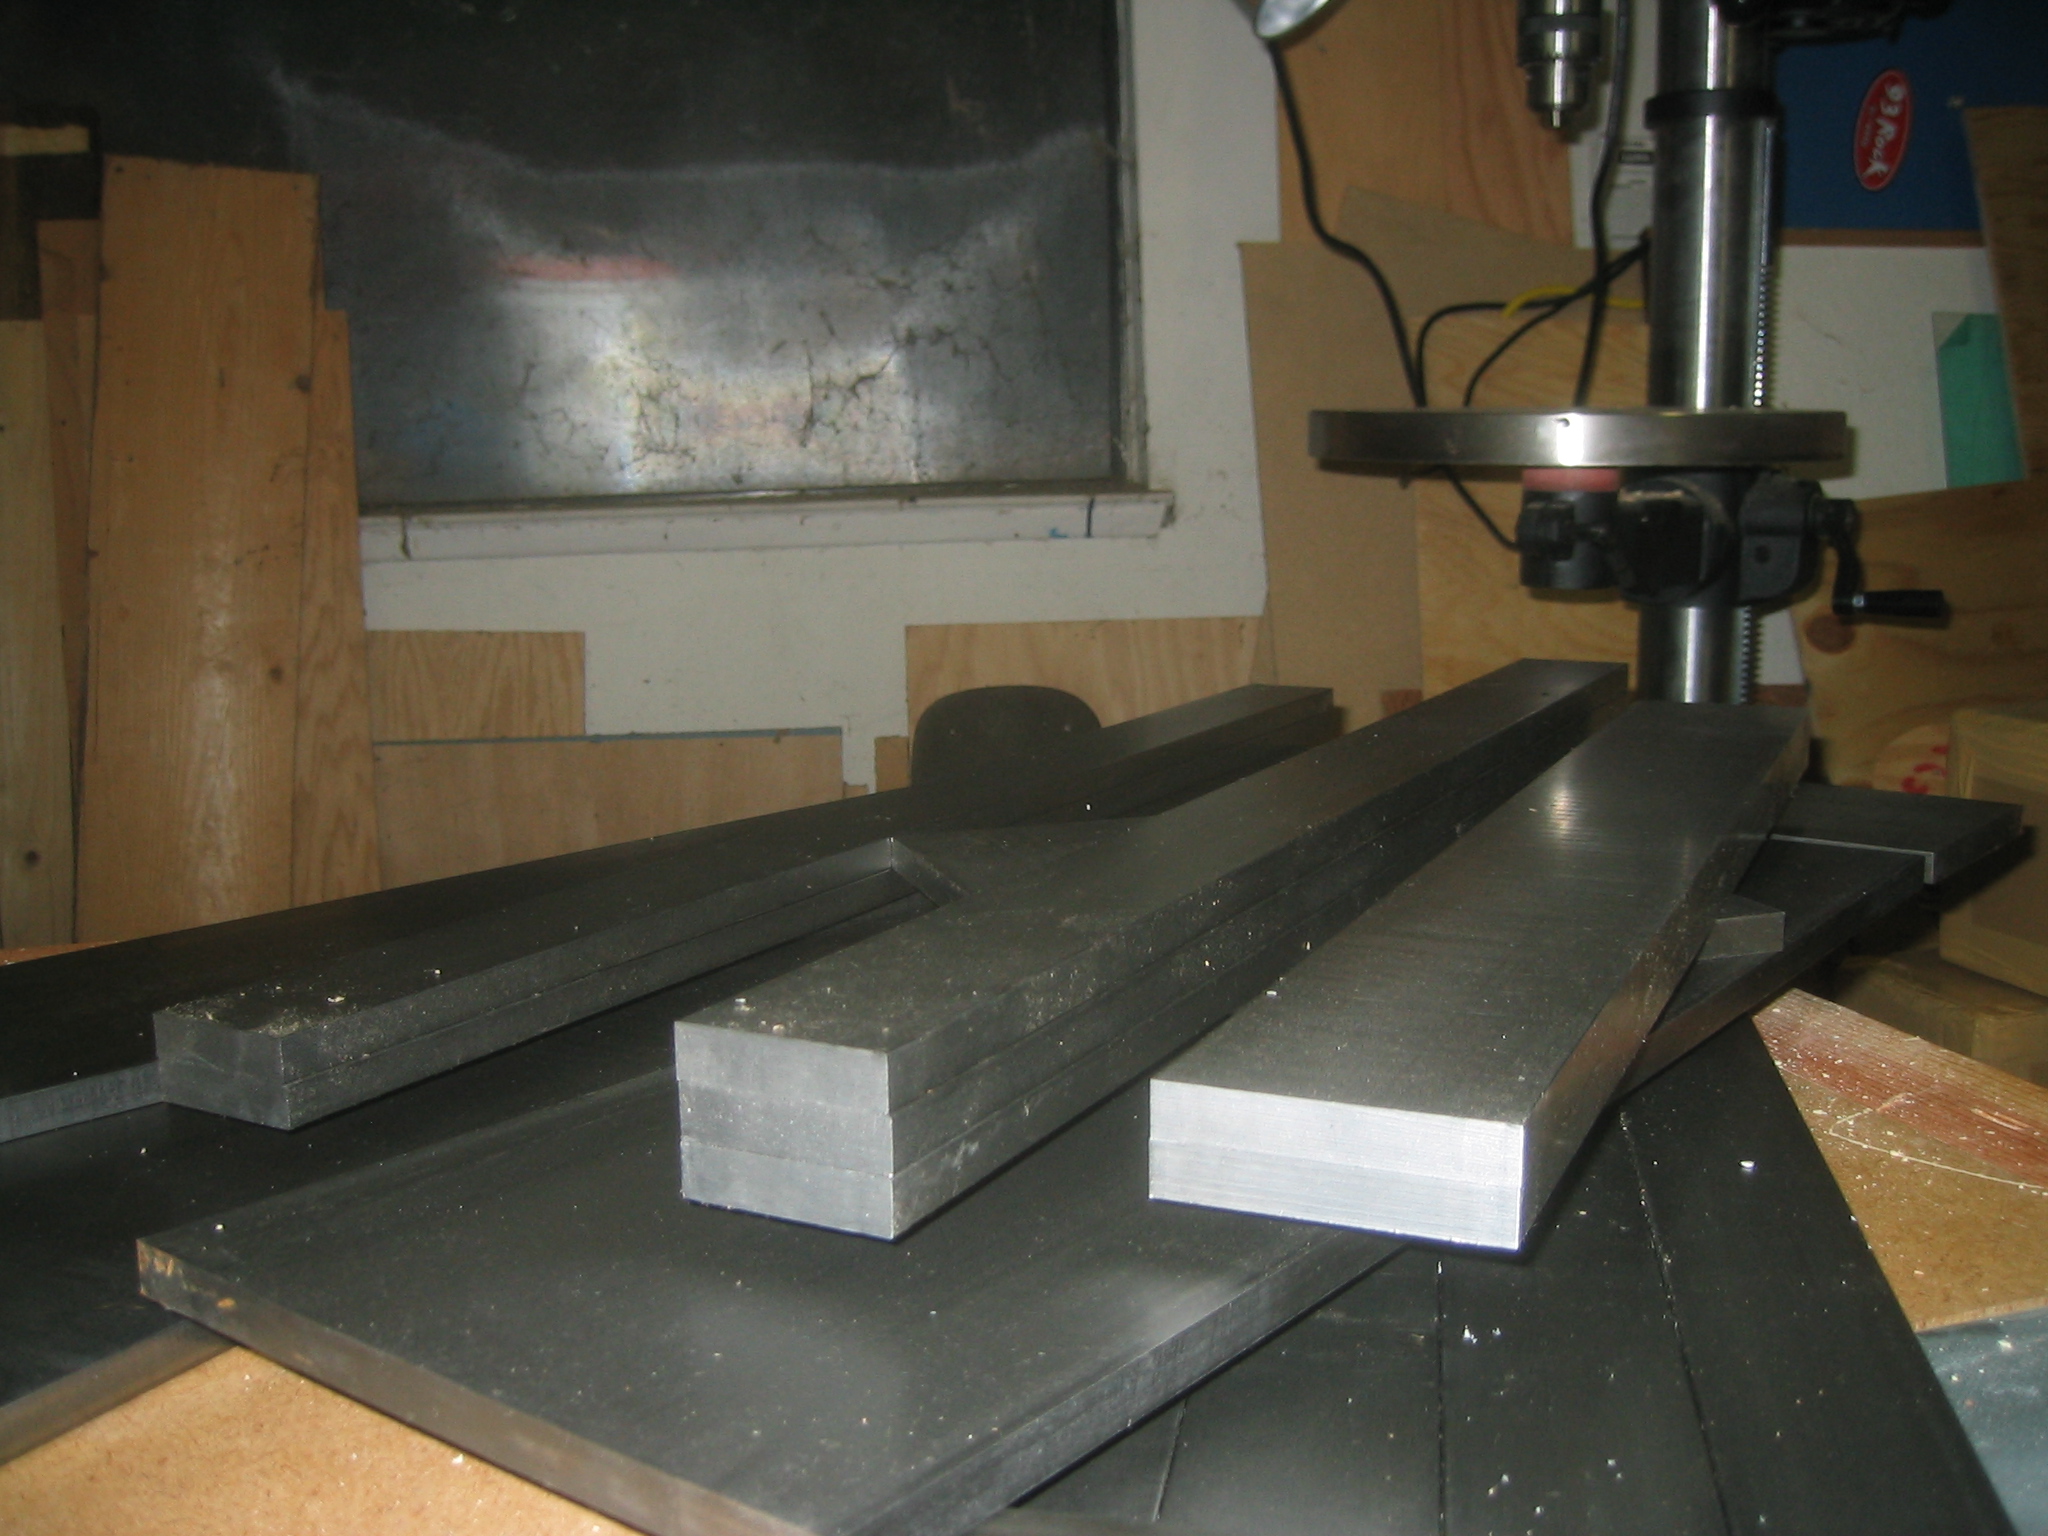
click photo for full sized picture.
So my steel finally arrived today. I am having a hard time imagining how it will all work out in the end but with some level of faith in my designs I continue onward. The next step will to begin the drilling of close to 100 holes that about half of which will need to be tapped. After Monday I will have almost to full weeks with no other obligations except to finish this stage of the project so I now it is the time for me too put my nose to the grindstone and get busy.
05//06/2004
This morning I finally took the leap and ordered the steel. I found this place on the net that has some pretty low prices and they don't charge per the cut. I think my order came out to about $1.50 a pound. Hopefully I am not getting screwed but even for really lousy steal that seems like a descent price.
05/02/2004
I finally found the time to sit down and hammer out the exact geometry of the structural bits of the machine. I actually found a few errors in my pen and paper measurements when setting up the model so I am glad I took the time to do it.
Looking at the last time I posted I think I might want to pick up the pace on this project a little. I am starting to relies why it took my father a year to finish his high fi cabinet. It just sometimes is so hard to get anything done especially hen your a student spending 12 hours a day on campus.
04/10/2003
Took a couple of minutes to upgrade the blueprint render so it looks a little better. Expect a Maya CGI section to come soon.
04/08/2003
I do most of my thinking in the shower and while doing so today I think I decided to hold off on buying a controller tell Dave Kushe from buildyouridea.com finishes the arcsin controller. Today I added my location to the web site and will later today be adding a CGI model of my blueprints. I got the blueprints rendered and posted. The design is still not quite finished and I will probably drop the thickness of the material in some places but I think it gets the overall idea across.
04/07/2003
The web page is up and I will hope to be updating it with some actual content in the next week or two.